Getting Started with CLI
The guide will introduce you to the EthVigil API endpoints with the help of a CLI tool that abstracts away the underlying HTTP requests. By the end of this guide, you shall be able to perform the following without a graphical frontend:
- sign up using your exclusive EthVigil invite code
- access your account information on EthVigil
- deploy a Solidity smart contract through the CLI tool
If you wish to setup the CLI tool later, skip this section of the guide to use the web interface directly ⏩ ⏩ Using the Web Interface
Recommended Installation
Download the Linux or Mac OSX binary. You can unzip from a terminal with the following command.
unzip /path/to/ev-cli-<platform>.zip
Most people would keep ev-cli in their primary user folder or set an alias for easy command-line access.
sudo cp /path/to/ethvigil-cli/ev-cli /usr/local/bin/
Advanced Installation (via pip)
Setting up your account
There are a few handy paths you can take to setup or initialize your account on the EthVigil CLI. Choose one of them from the following as it fits your scenario.
✅ Generate a new EthVigil invite code and complete signup on CLI
Head to EthVigil Beta to generate an invite code. Next you will need to run an init on the CLI tool.
If you do not have ev-cli in your path and/or calling it directly, you will need to prefix
./
On the next prompt you will be asked for your invite code. The invite code should have been sent to the email address you used to register.
Enter your invite code: <invite-code-goes-here>
You should see something like the following
On EthVigil APIs, you are primarily idenitified by the above 160 bit address that we have generated locally for you.
0xdFaFF6081f4544fEb76d213DEB2f9DC3C8453b6 in this case.
You can import the corresponding private key to a wallet solution like MetaMask.
The keys are locally stored and EthVigil does not have access to them. You can check the
~/.ethvigil/settings.jsonfile once init is complete.
Feel free to skip to the section
Get your EthVigil account informationif you have completed your account setup following the above instructions.
✅ Reuse your in-browser local wallet settings (No Metamask involved)
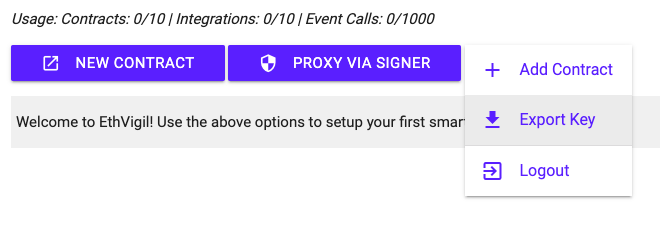
If you are already signed up on the Web UI with a local wallet, you can export a settings.json file that can be used to initialize the CLI.
Use the Export Key option from the Settings dropdown to download the settings.json
Next run the following command on your terminal to import these settings
If you do not have ev-cli in your path and/or calling it directly, you will need to prefix
./
And that's it! Your CLI tool is now ready for further use. The GIF below demonstrates these instructions in action.

Get your EthVigil account information
Once initialized, you can find information related to your EthVigil account through the CLI tool.
Deploy a Solidity smart contract
We have included a couple of smart contracts written in Solidity in the Github repo to help you test out their deployment right away.
You can find them under contracts/ as ERC20Mintable.sol and SignerControlBase.sol
The syntax to deploy a contract through the CLI tool is:
Currently EthVigil API accepts Solidity files that import other Solidity files containing smart contracts and library code, within the same directory. For example, your imports must be of the form
import './SafeMath.sol'denoting thatSafeMath.solis to be found in the same directory.
We will soon add support for parsing relative import paths as well. Feel free to create a pull request against our Github repo or chat with us on the public discord channel if you wish to contribute to solving this.
ERC20 token contract example - ERC20Mintable.sol
Observe that we are setting --constructorInputs. It is optional for contracts that have no constructor inputs programmed.
If you do not pass the --constructorInputs argument, you shall be prompted for the same.
SignerControlBase.sol
This contract forms the base of EthVigil's Proxy+Signer Control contract. Without going into the logic of the contract, let us take a look at the constructor as written in the contract.
⚠️Passing JSON serialized constructor inputs to the CLI tool
This section deals with passing constructor inputs via the CLI tool. It is always easier to do the same with code. There can be compounding confusion since
- individual constructor parameters that are arrays are expected by the EthVigil API to be encoded as strings
- the CLI tool itself accepts all the inputs as an array string.
An equivalent representation of the constructor inputs in JSON would look like
Example to generate the JSON serialized string with Python follows
We dumped the JSON representation of the entire array of constructor inputs into a file, c_inputs.
We shall pass this next to the command line option of --constructorInputs in our call to deploy.
Verifying a previously deployed contract
Ethereum is decentralized, and you may have deployed contracts through a different interface, for eg, remix.ethereum.org and would like to operate on them through your current EthVigil account.
For this purpose, you will have to verify and add the contract to your account by specifying a few details, including the contract source code.
To use the feature of verifying and adding contracts to EthVigil, we assume that you have the source code and the address at which the contract has been deployed.
Here we have deployed the Microblog.sol contract found in the CLI example contracts directory, contracts/Microblog.sol through remix.ethereum.org , compiled with the Solidity compiler v0.5.17+commit.d19bba13 and optimization flag off.

Interactive mode
Run the verify command in interactive mode
or
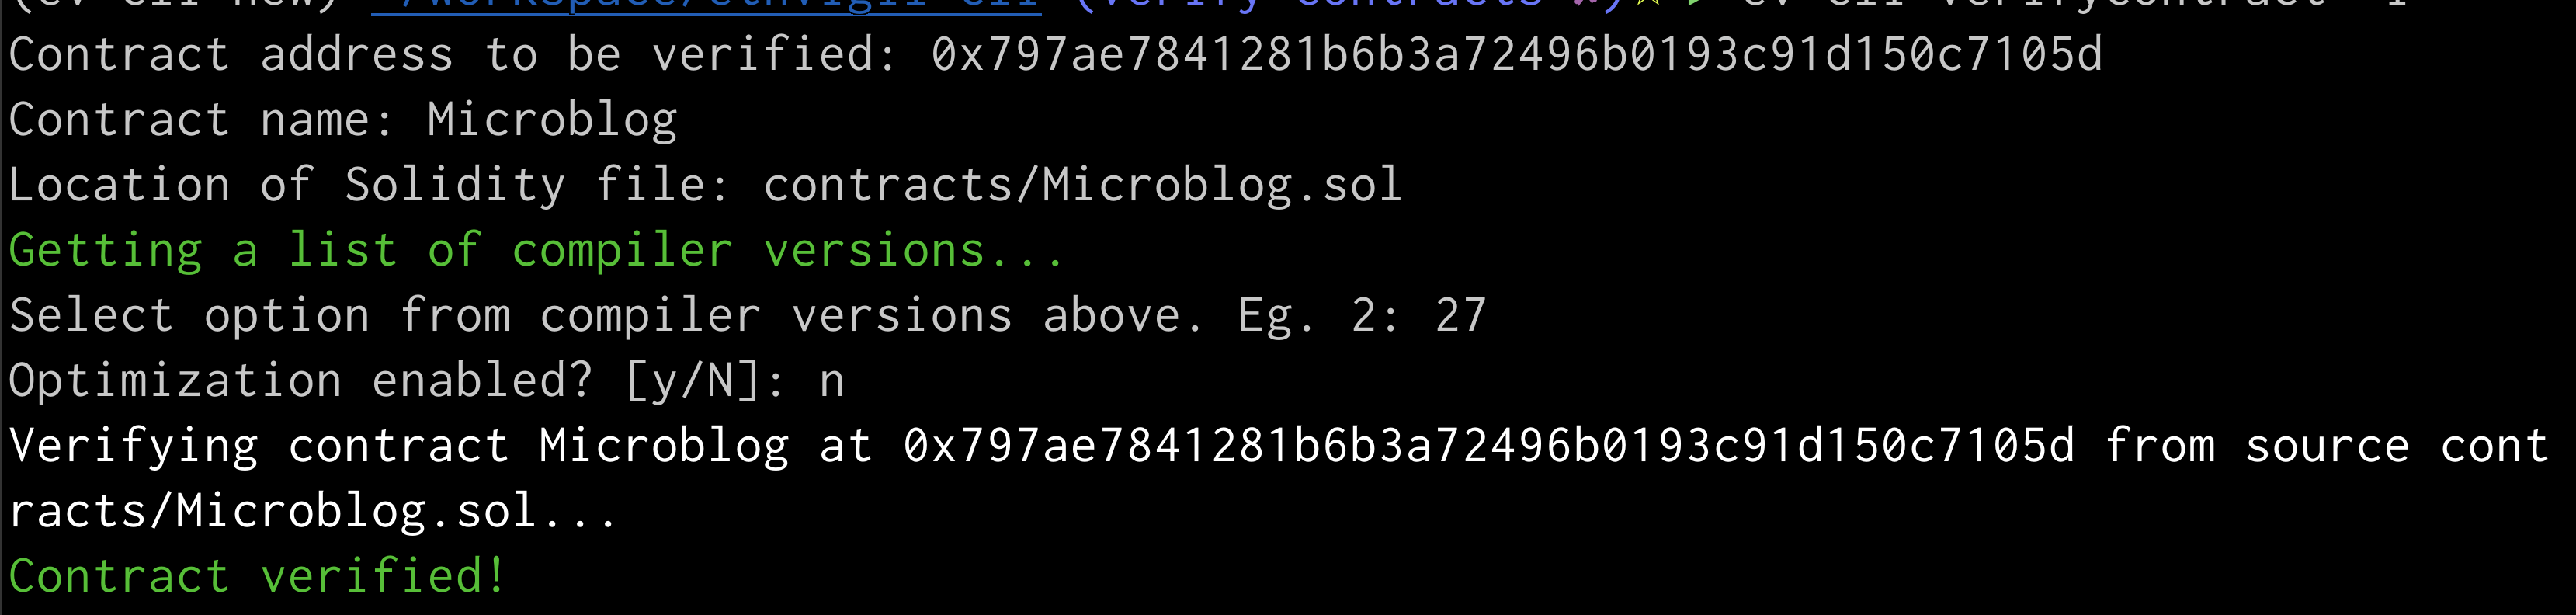
Let us go over the input prompts for the interactive mode.
Contract address to be verified: 0x797ae7841281b6b3a72496b0193c91d150c7105dContract name: MicroblogLocation of Solidity file: contracts/Microblog.sol
Next you will have a paged list of compilers from which you have to choose the integer value against the compiler version which was used to compile the contract on https://remix.ethereum.org.

In our case, the Solidity compiler
v0.5.17+commit.d19bba13is at27. Pressqto exit the list and go back to the input prompt where you can enter this value
The last input is regarding the optimization flag set originally at the time of compiling the deployed contract. Which is off in this case.
If you entered all the values at the prompts correctly, you should see a success message.
Non-interactive mode (pass CLI arguments)
The same process as described above can be achieved from the command line by passing the right arguments against the parameters.
You can run
ev-cli verifycontract --helpto learn about all the parameters

Adding integrations
You can add integrations like webhooks/email notifications/slack notifications on a contract deployed via EthVigil APIs.
- You can monitor
- specific/all events being emitted on a contract
- all transactions taking place on a contract
- You receive the relevant payloads like event topics or transaction input data
Webhooks
To test webhooks, it is suggested to set up a webhook listener on a service like https://webhook.site
EthVigil supports only HTTPS enabled webhook endpoints
Register the webhook endpoint to get an ID by which the endpoint willl be identified
Subscribe to the Transfer and Approval events on the contract
Subscribe to all events, with a wildcard, *
Subscribe to all transactions sent to the contract
More CLI features
Dump local settings
Reset
If you wish to begin with a fresh slate, run the tool with the reset argument.
You will lose all saved state, including the private key used to identify your account on EthVigil. You should either backup the information or request a new invite code