Getting Started with the Web UI
The guide will introduce you to the EthVigil API endpoints with the help of a Web UI that abstracts away the underlying HTTP requests:
- sign up using your exclusive EthVigil invite code
- deploy a Solidity smart contract
- access the Solidity smart contract using REST APIs
- setup webhooks to monitor transactions and events
If you wish to setup the CLI tool, skip this section of the guide to learn how to set it up ⏩ ⏩ Using the CLI tool
Sign up with invite code
Head to EthVigil Beta to generate an invite code.
Enter your email, password (to generate a local wallet) and fill the captcha to request an invite. We usually send our invites in waves but if you are participating in hackathons such as ETHGlobal or through our partner networks, you will get one instantly.
Optionally, we use Metamask to securely manage your account with us. You do NOT need to have any gas on mainnet or testnet – we handle the transaction costs for deployments and contract calls. More on proxying contract calls will be explained later.
On the next prompt you will be asked for your invite code. The invite code should have been sent to the email address you used to register.
Once you are signed up, you'll be taken to a dashboard where you can see all the contracts deployed through EthVigil.
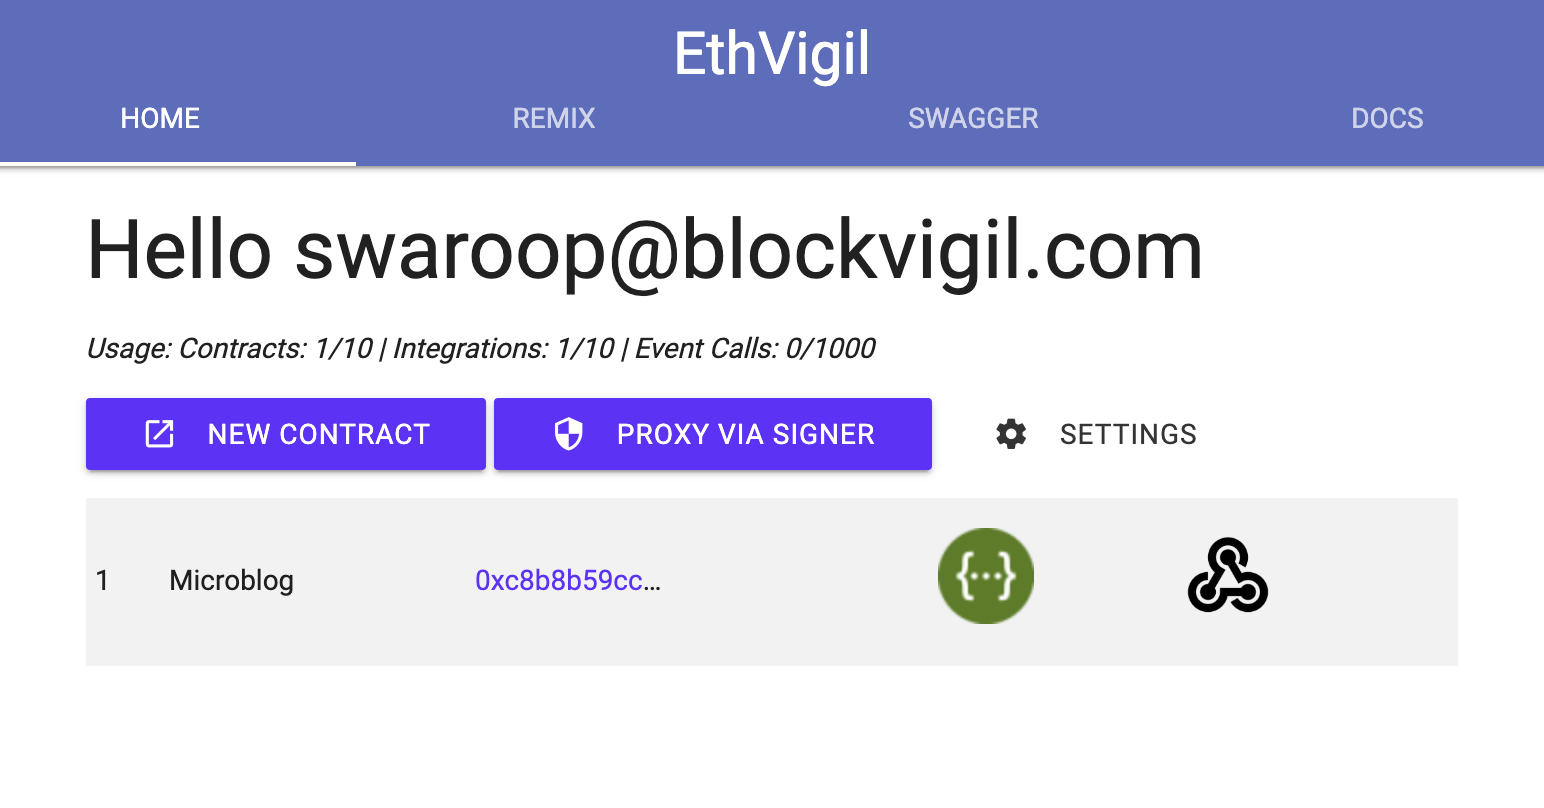
Deploy a Solidity smart contract
Head to Remix (or click New Contract) to deploy your first smart contract with us. It loads the full Remix IDE, so it make take time on slower connections.
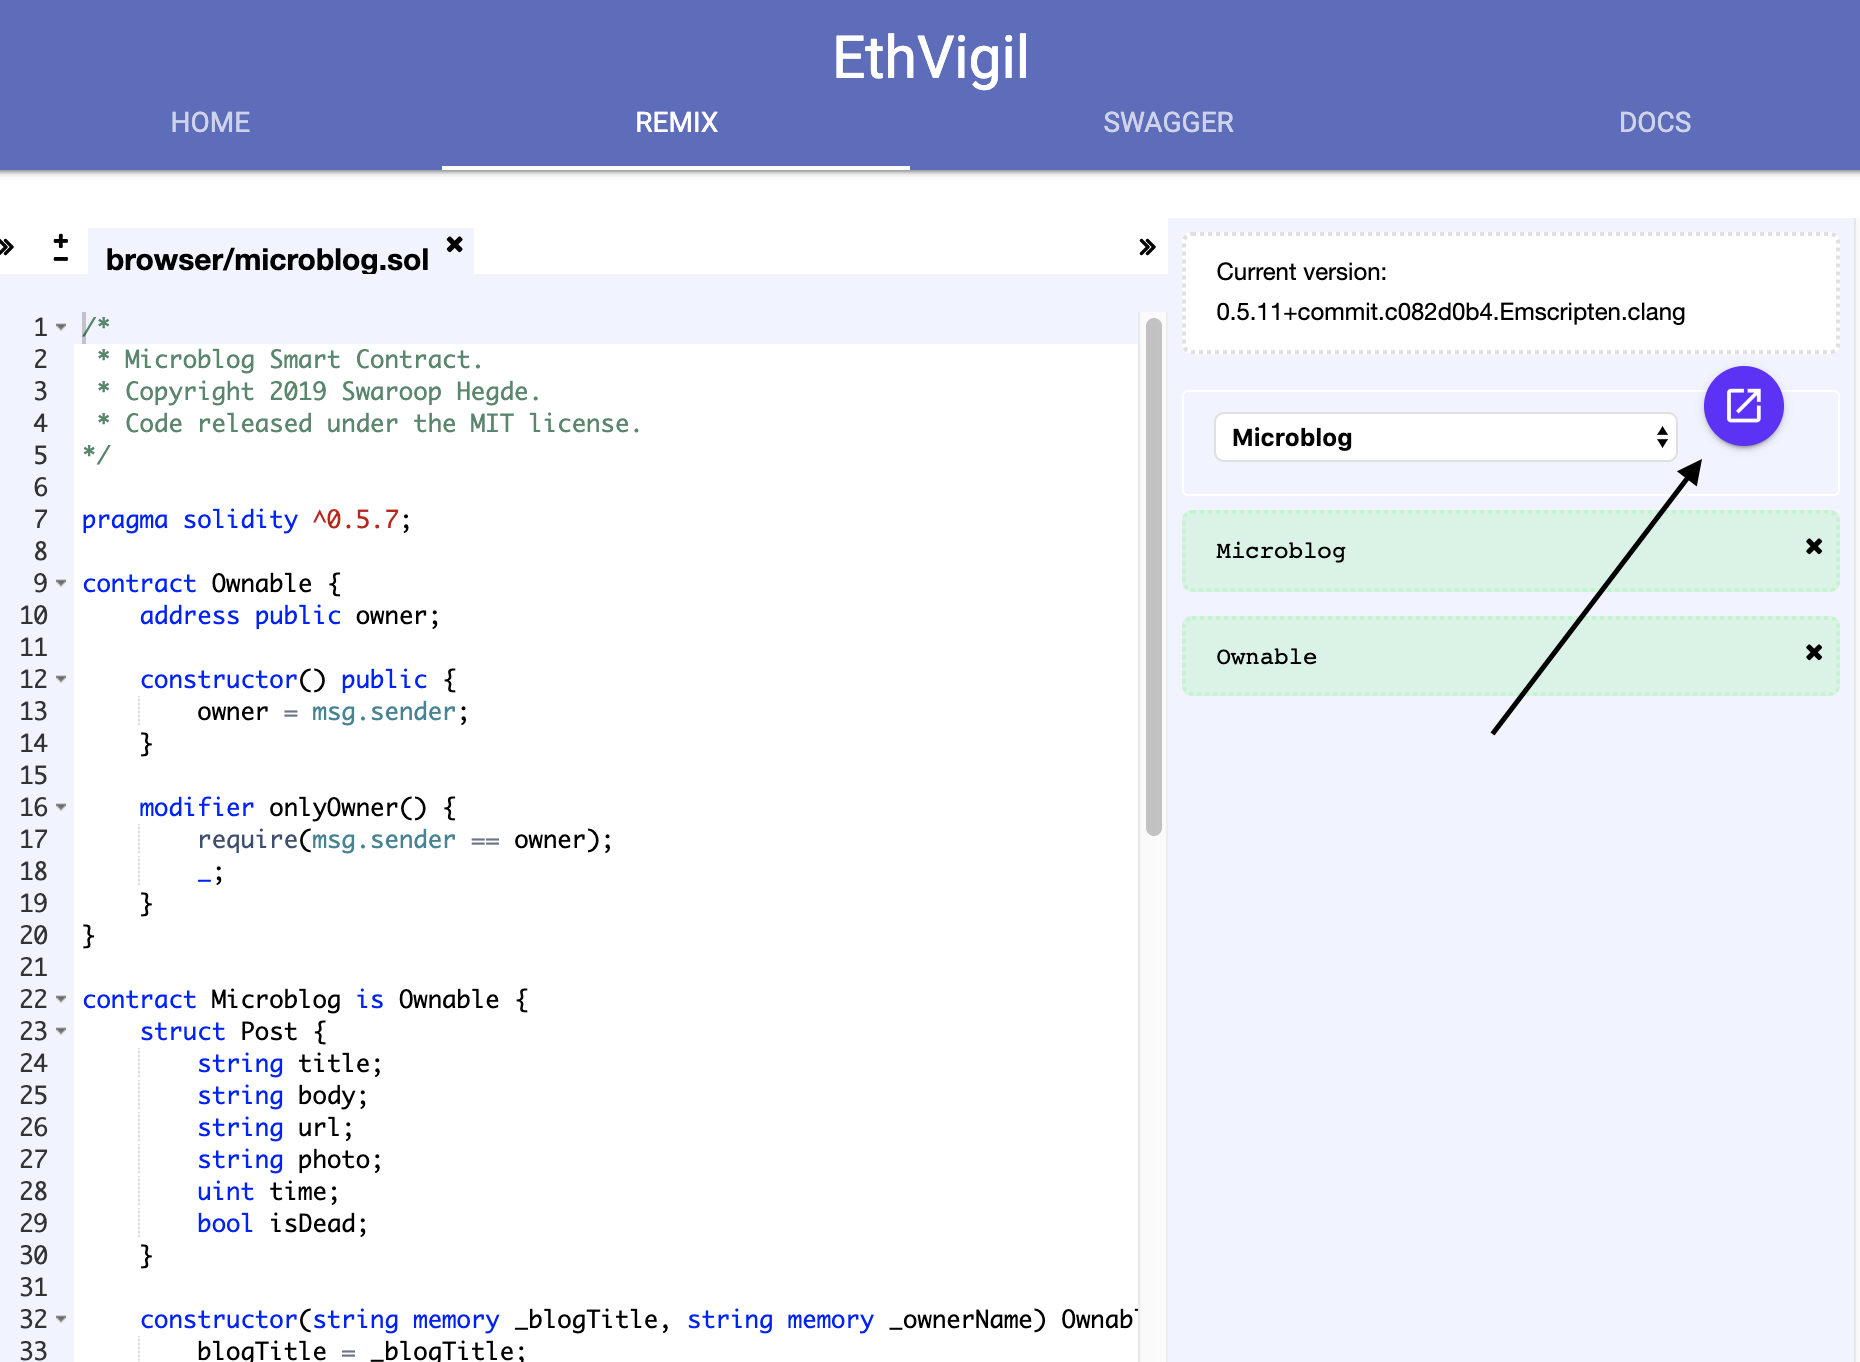
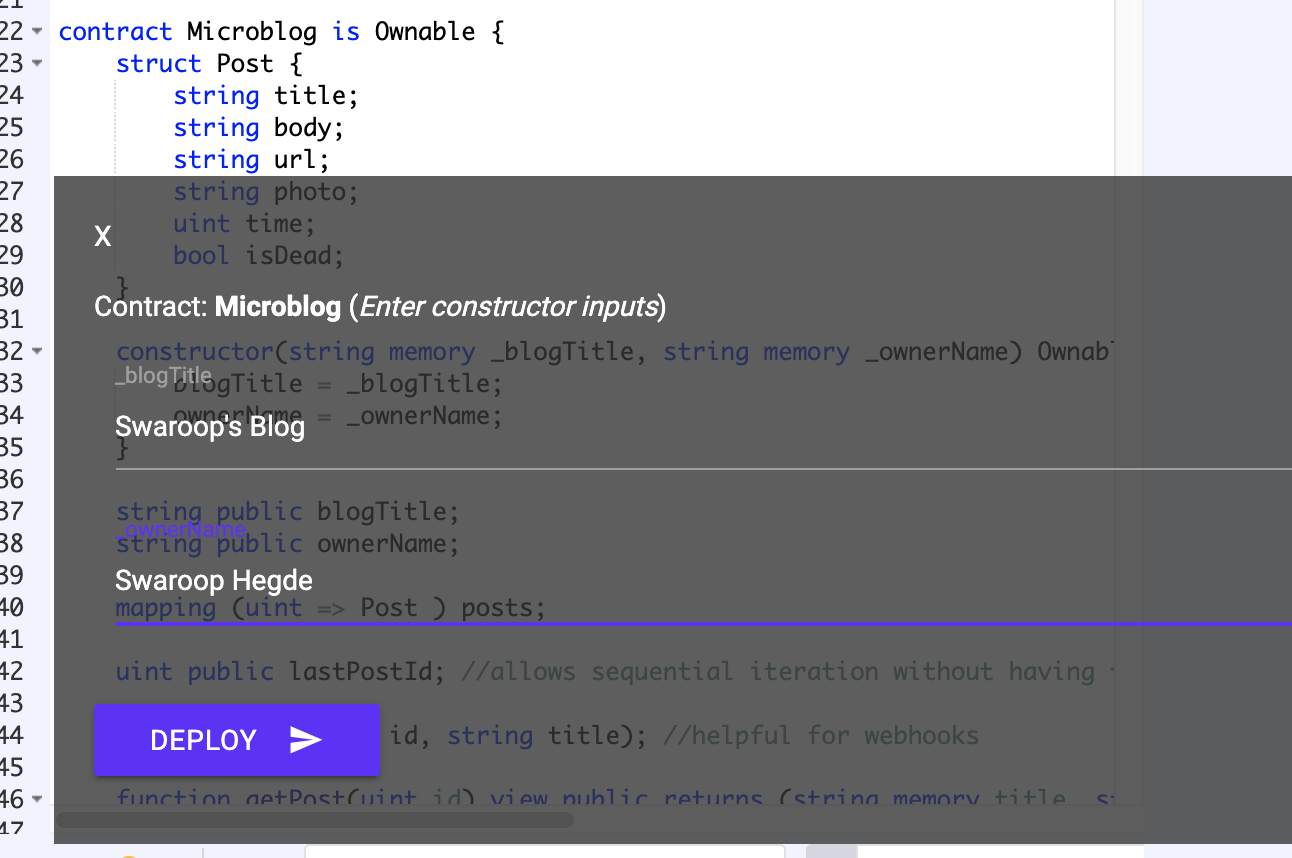
We have preloaded a MicroBlog Smart contract. Deploy the contract by clicking the pulse button. You can enter inputs to the contract constructor but we'll cover more about that later. Also, feel free to add your own contract but we highly recommending starting with MicroBlog to see the effortless deployment and other features!
Using the REST API
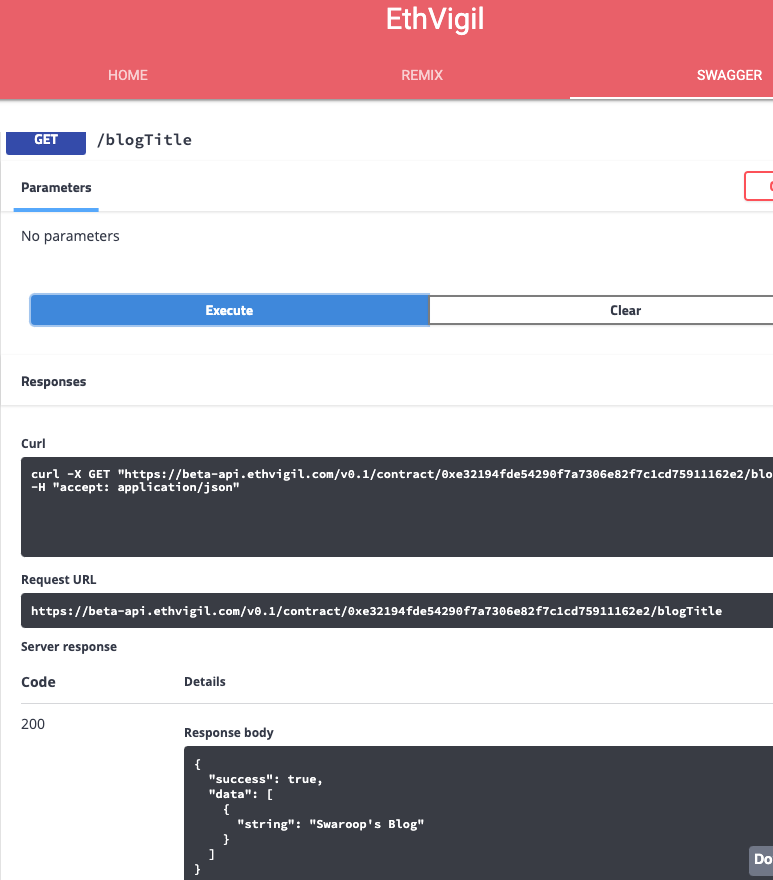
You will now be taken to a Swagger UI page which allows you to interact with our REST APIs. Behind the scenes, we generate a powerful OpenAPI 3.0 compatible json that you can use in tools such as Postman.
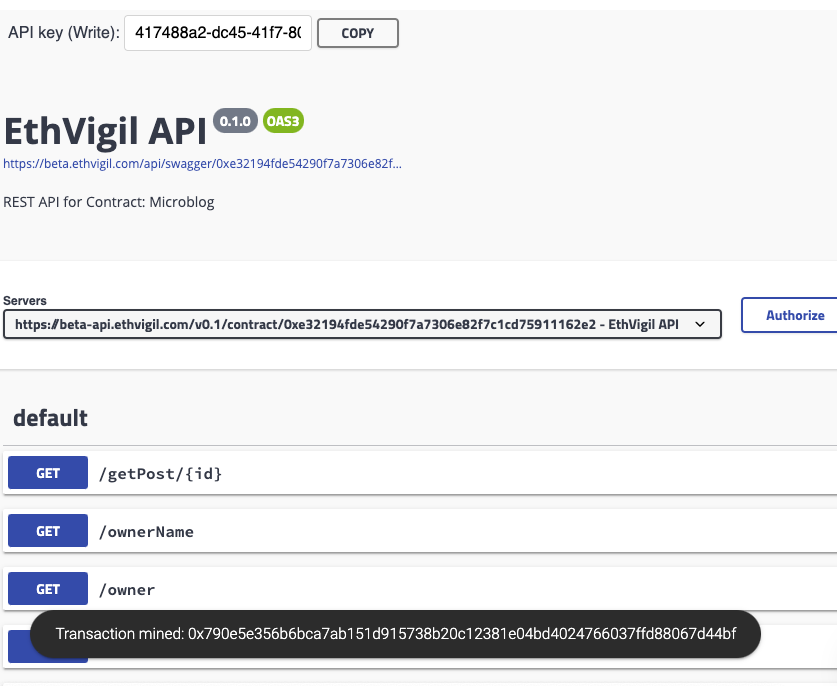
🍪 Brownie points for those who noticed the little websocket notification about the contract tx getting mined 🎉
Try out any of the calls such as /blockTitle and see the response without having to write any code. You can also take the curl example and try it directly in your browser or a terminal
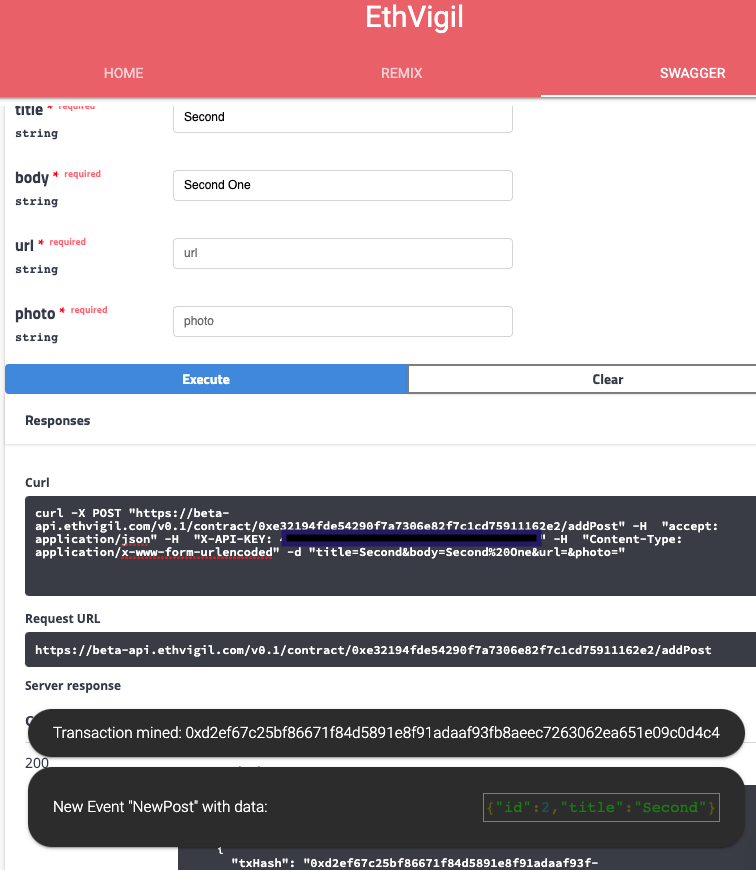
Now, reading from Blockchain may be easy. But ensuring write calls go through with the correct encoding, gas, nonce and transaction itself is complex. We abstract all of that away without you having to even sign with your key. Try /addPost and check the transaction hash and the events generated.
Adding integrations
Let's back to the add dashboard where you can add integrations like webhooks/email notifications/slack notifications on a contract deployed via EthVigil APIs.
- You can monitor
- specific/all events being emitted on a contract
- all transactions taking place on a contract
- You receive the relevant payloads like event topics or transaction input data
Webhooks
To test webhooks, it is suggested to set up a webhook listener on a service like https://webhook.site
EthVigil supports only HTTPS enabled webhook endpoints
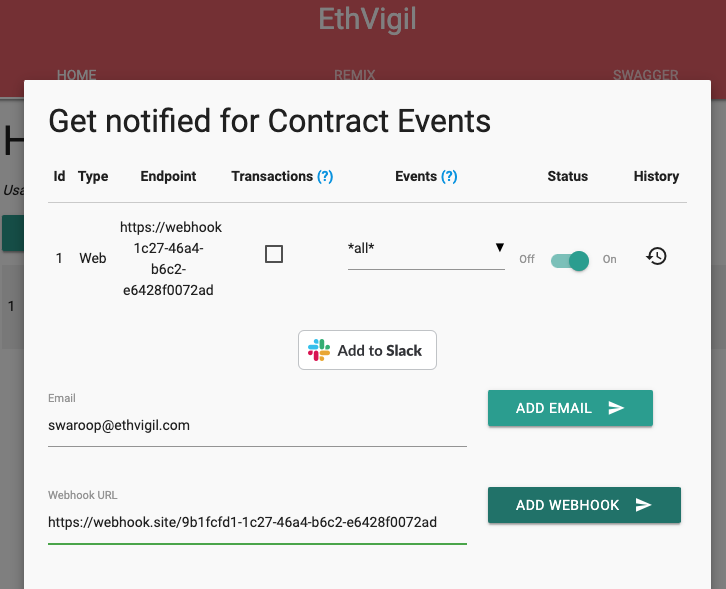
By default, we subscribe you to all events but you can chose one or more such as New Post. You may also subscribe to raw transaction events.
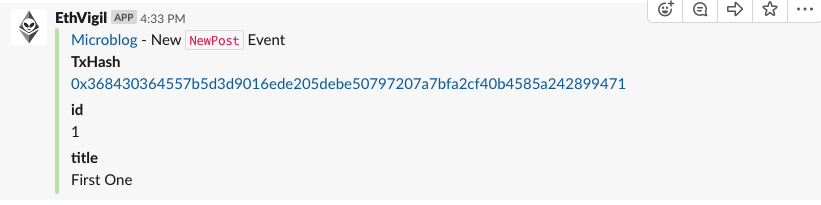
Slack
You can similarly setup a Slack integration. We will post all events to a channel of your choice.
Deploying Apps
We allow packaged apps to quickly integrate with our APIs against known smart contracts. If you deployed the MicroBlog as is, you'll see an option to Deploy on Heroku/Github pages. Check out the EthVigil Microblog to see a live app in action.
